

Key takeaways
- Printed roof: The highest-visibility option for an open-air event. A full-color dye-sublimated roof normally costs more but keeps the logo visible above nearby booths.
- Valance graphics: A useful compromise when the budget does not support a fully printed canopy. Confirm whether the valance is a separate zip-on panel or permanently sewn into the roof.
- Full walls: Printed walls turn the canopy into a three-sided backdrop and conceal storage. They also catch wind, so they increase anchoring requirements.
- Half walls: Good for keeping the booth visually open while hiding boxes, coolers, or spare stock below table height.
- Rear banner or hook-and-loop graphics: Flexible for businesses that change campaigns. Check whether the fabric system creates wrinkles or leaves gaps at the corners.
The best pop up event tents for most exhibitors are commercial-grade 10 × 10 ft canopies with an aluminum or reinforced-steel frame, a fire-rated polyester top, full sidewalls, and a proper anchoring kit; choose a 10 × 20 ft model when you need a staffed booth, demonstrations, or a larger branded backdrop.
Our top picks
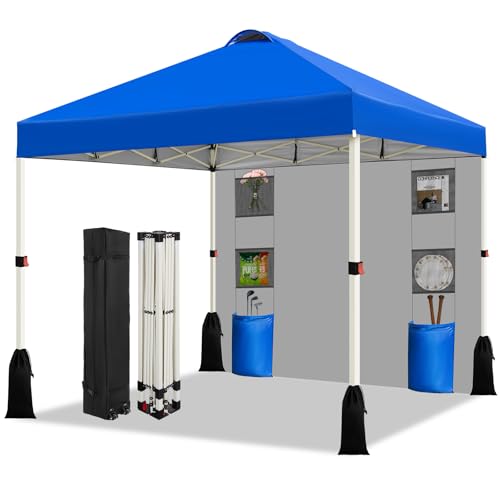


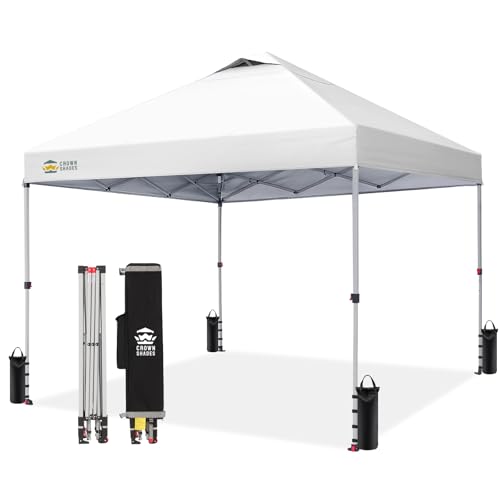
As an Amazon Associate we earn from qualifying purchases at no extra cost to you. Ratings are shown as listed on Amazon.
Best pop up event tents by situation
| Situation | Best footprint | Frame choice | Useful target weight | Why it fits |
|---|---|---|---|---|
| Occasional market stall or school event | 10 × 10 ft | Commercial steel | 45–65 lb | Lower purchase cost and good resistance to frequent assembly mistakes |
| Frequent trade shows and brand activations | 10 × 10 ft | Hexagonal or square aluminum | 35–55 lb | Lighter to carry, easier to customize, and less prone to rust |
| Two-person booth with table, samples, and signage | 10 × 20 ft | Reinforced aluminum or steel | 70–110 lb | Provides a second work zone without crowding the entrance |
| Very limited pitch or indoor exhibition space | 8 × 8 ft or 8 × 10 ft | Aluminum | 25–45 lb | Preserves walking clearance while still creating overhead cover |
| Wind-exposed outdoor event | 10 × 10 ft | Heavy-duty steel or reinforced aluminum | 55–80 lb before ballast | Allows stronger hardware and larger ballast bags; never rely on frame weight alone |
These are practical buying targets rather than universal specifications. Actual packed weight, peak height, and wind guidance vary by manufacturer and by whether walls, roller bags, and ballast are included.
What separates an event-ready canopy from a basic shelter?
A recreational canopy is usually designed for occasional shade. An event canopy must also handle repeated transport, branding, wall attachment, uneven surfaces, and several setup cycles in one season. Look for a commercial-grade top with reinforced corner patches, hook-and-loop attachment around the perimeter, replaceable hardware, and a roof that can be removed for cleaning.
The most useful standard footprint is 10 × 10 ft, or 100 square feet. It accommodates a 6 ft folding table along the back wall, two narrow display racks, and a standing area in front. A 10 × 20 ft tent provides 200 square feet, but it does not simply feel twice as spacious: its longer roof, walls, and ballast are harder to move, and many venues charge for the additional floor area.
Check the height, not only the floor area
Most event canopies have adjustable legs and a center height around 8 to 11 ft. The clearance under the valance may be significantly lower. If you plan to use a hanging sign, tall product display, or lighting bar, confirm both the peak height and the usable side clearance. A sloped roof can reduce the effective space near the edges.
Frame materials: aluminum versus steel
Aluminum
Aluminum frames are generally the better choice for people who load and unload a tent frequently. They are lighter, do not rust when the finish is intact, and are easier for one person to roll over short distances. Their disadvantages are higher cost and greater sensitivity to bent truss bars or damaged connector joints. A lightweight aluminum frame is not automatically a heavy-duty frame; inspect the truss profile, joint design, and replacement-parts policy.
Steel
Steel frames usually offer more mass for the money and can tolerate rough handling well. They are attractive for occasional users, permanent event crews, and windy sites where a robust frame is useful. The trade-off is transport weight and corrosion risk. Dry a steel frame completely before storage, especially where water can remain inside telescoping legs.
For either material, avoid judging quality by the number of legs alone. A six-leg 10 × 20 ft frame may distribute roof load well, but the connectors, roof bars, foot plates, and leg locking pins determine how it behaves in repeated use.
Branding options that are worth paying for
- Printed roof: The highest-visibility option for an open-air event. A full-color dye-sublimated roof normally costs more but keeps the logo visible above nearby booths.
- Valance graphics: A useful compromise when the budget does not support a fully printed canopy. Confirm whether the valance is a separate zip-on panel or permanently sewn into the roof.
- Full walls: Printed walls turn the canopy into a three-sided backdrop and conceal storage. They also catch wind, so they increase anchoring requirements.
- Half walls: Good for keeping the booth visually open while hiding boxes, coolers, or spare stock below table height.
- Rear banner or hook-and-loop graphics: Flexible for businesses that change campaigns. Check whether the fabric system creates wrinkles or leaves gaps at the corners.
For recurring events, a replaceable graphic system can be cheaper over time than buying an entirely new tent for every campaign. Before ordering custom printing, measure the actual graphic panel dimensions rather than assuming every 10 × 10 ft canopy uses the same wall size.
Sidewalls: enclosure, airflow, and access
A complete wall set commonly includes a back wall, two sidewalls, and a front or awning panel. Full enclosure protects merchandise from light rain and creates a controlled visual backdrop, but it also reduces airflow and increases wind loading. In warm weather, a back wall plus two half walls is often more comfortable than four solid panels.
Prioritize walls with strong zippers, reinforced attachment points, and a clear method for separating the front opening from the rear wall. A center-zip front door is convenient for security, while a full-width removable front wall makes the booth more welcoming. Mesh or window panels can improve ventilation, but they do not provide the same privacy or rain protection as solid fabric.
Setup: the sequence that prevents damage
- Choose a level position. Remove stones and check overhead clearance before unfolding the frame. A sloping surface can make the roof look uneven and place stress on one leg.
- Lay the folded frame on its feet. Extend it only partway, keeping hands outside the scissor joints and truss intersections.
- Attach the roof before fully raising the legs. On many designs, the roof is easiest to secure while the frame is waist-high. Follow the supplied order because some roofs attach at the corners first and others at the center.
- Raise each corner evenly. Move around the frame rather than forcing one leg to full height while the others remain low. Engage every spring button or locking pin.
- Add walls and branding. Attach the rear wall first, then sidewalls, then the front panel. This reduces awkward reaching and makes it easier to keep zippers aligned.
- Anchor before loading the booth. Ballast each leg, attach guy lines where permitted, and check that doors and walls are not pulling the frame sideways.
Never use a canopy as a shelter during lightning, severe storms, or conditions beyond its manufacturer’s guidance. Lowering or removing the roof is safer than hoping extra rope will compensate for dangerous weather.
Anchoring: the overlooked specification
On grass, use suitable stakes with guy lines where the venue permits them. On asphalt or concrete, use purpose-made ballast weights or water-filled ballast systems designed for canopies. A common planning range is 25–40 lb per leg for mild conditions, with more required for large enclosed tents, exposed locations, or manufacturer instructions that specify a higher value.
Consider a 10 × 10 ft tent with four legs and 30 lb of ballast per leg: the minimum ballast plan is 4 × 30 = 120 lb. That is more than the packed frame weight of many canopies, so transport planning must include ballast separately. Water weights are easier to carry empty but may freeze, leak, or be unavailable at the venue. Solid weights are dependable but heavy from the moment you load them.
Transport weight and ownership costs
A listed frame weight often excludes the roof, walls, roller bag, stakes, and ballast. A realistic 10 × 10 ft event setup may weigh 55–90 lb once accessories are included; a 10 × 20 ft setup can exceed 120 lb before anchoring. If one person must move it, prioritize a roller bag with large wheels, a reinforced base, and handles at multiple heights.
As a simple cost-per-use comparison, a $600 canopy used six times costs $100 per event before replacement parts. A $1,200 commercial canopy used 24 times costs $50 per event. The more expensive option becomes practical when you attend enough events to benefit from stronger fabric, replaceable components, and reduced setup frustration. Occasional users may be better served by a mid-priced steel model and a quality bag rather than paying for premium graphics.
Durability and maintenance realities
The first parts to wear are commonly roof corners, hook-and-loop strips, zipper sliders, leg-lock buttons, and roller-bag wheels. Do not drag a loaded canopy across pavement; it can bend feet and abrade the bag. Keep a small repair kit with spare pins, short guy lines, fabric repair tape, and compatible replacement stakes.
- Brush off dry dirt before folding the fabric.
- Clean stains with mild soap and cool water; avoid bleach unless the manufacturer permits it.
- Dry the roof and walls completely before storage to prevent mildew.
- Lubricate or clean telescoping joints only according to the manufacturer’s instructions; greasy parts can attract grit.
- Inspect every truss and connector before an event, especially after air travel or a windy day.
Final buying recommendation
Choose a commercial 10 × 10 ft aluminum canopy if you attend events regularly and transport the shelter yourself. Choose a reinforced-steel 10 × 10 ft model for lower upfront cost and occasional use. Move to 10 × 20 ft only when the extra floor area has a defined job—such as a second table, demonstration zone, or enclosed inventory area. Whichever size you select, spend as much attention on sidewalls, ballast, replacement parts, and transport as on the roof fabric: those details determine whether the tent remains useful after its first few events.





Write Your Review
No reviews yet. Be the first to share your experience!