

Key takeaways
- Water storage and treatment equipment: 3–5 L
- Food and compact cooking items: 5–7 L
- Shelter and sleep insulation: 8–12 L
- Clothing and rain protection: 5–7 L
- First aid, hygiene, lighting, power, and documents: 3–5 L
- Tools and repair supplies: 2–3 L
The best survival backpacks are not the largest bags available: they are durable, adjustable packs that carry an evacuation load comfortably, protect essential gear from weather, and keep frequently used items accessible. For most people, a 35–45-liter internal-frame backpack is the best balance; choose 20–30 liters for a short urban evacuation and 60–75 liters only when extended travel or cold-weather equipment is realistic.
Our top picks


As an Amazon Associate we earn from qualifying purchases at no extra cost to you. Ratings are shown as listed on Amazon.
Quick Picks by Emergency Scenario
| Situation | Recommended pack type | Useful capacity | What matters most |
|---|---|---|---|
| Commuter or apartment evacuation | Technical daypack | 20–30 L | Low profile, organization, laptop or document protection |
| 72-hour household kit | Medium internal-frame pack | 35–45 L | Load transfer, water resistance, expandable storage |
| Backcountry survival and shelter | Lightweight trekking pack | 50–65 L | Hip-belt comfort, external attachment points, repairability |
| Extended cold-weather relocation | Expedition-style pack | 65–75 L | Heavy-load support, sleeping-system access, durable fabric |
Best Survival Backpacks: The Shortlist
Best all-purpose choice: a 40-liter internal-frame hiking pack
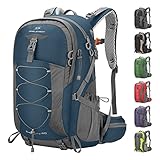
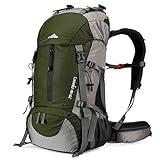
A well-fitted 40-liter hiking pack is the strongest default for evacuation kits and outdoor survival. It can hold water, food, a compact shelter, insulation, first-aid supplies, spare clothing, lighting, and basic tools without encouraging unnecessary packing. Look for an adjustable torso harness, a padded hip belt, load-lifter straps, a sternum strap, and side compression straps.
Common examples include the Osprey Exos 48, Osprey Atmos AG 50, Gregory Zulu 40, and similar packs from Deuter, REI Co-op, and Granite Gear. These models differ in frame style and weight, so compare the actual specifications rather than assuming every pack in the same capacity class carries identically. A highly ventilated suspension is comfortable in hot weather, while a closer-fitting frame usually handles awkward or heavy loads better.
Best for urban evacuation: a 24–30-liter technical daypack
For commuting, wildfire evacuation, storms, or moving through crowded streets, a 24–30-liter daypack is easier to store and less conspicuous than a large trekking pack. Choose one with two large compartments, a document sleeve, water-bottle pockets, a sternum strap, and a real hip belt rather than a decorative webbing strap.
The Mystery Ranch 2 Day Assault Pack is a recognizable example of a structured, organization-focused daypack. The Patagonia Black Hole 32L is another useful reference point for weather-resistant fabric and a relatively simple layout. Neither style is automatically ideal for every person: tactical-style organization adds access and durability but can increase empty weight, while a travel-oriented pack may lack the load transfer needed for heavy water supplies.
Best for extended outdoor carry: a 60–75-liter trekking or expedition pack
Large packs make sense when the load includes a sleeping bag, sleeping pad, shelter, cooking equipment, winter layers, and several days of food. The Osprey Aether Plus 70, Gregory Baltoro 65, and comparable packs from Deuter and Fjällräven illustrate this category. They typically offer robust hip belts, adjustable torso lengths, multiple access points, and compression systems.
The disadvantage is easy to underestimate: a 70-liter pack invites a heavier load. A fully loaded evacuation pack can become difficult to lift, fit into a vehicle, or carry safely over uneven ground. Buy this size only if you have a defined gear list and have practiced carrying it.
Head-to-Head Comparison
| Pack category | Typical empty weight | Practical load | Access and organization | Water resistance | Repair outlook |
|---|---|---|---|---|---|
| Technical daypack, 20–30 L | 0.8–1.5 kg | 5–10 kg | Excellent quick access; many sleeves | DWR-coated fabric; use a liner | Simple webbing and buckles are easy to replace |
| Lightweight hiking pack, 35–50 L | 1.0–1.6 kg | 8–14 kg | Good main compartment; fewer small pockets | Moderate; seams may need a cover or liner | Light fabrics need careful handling |
| Supportive trekking pack, 50–70 L | 1.6–2.6 kg | 12–20 kg | Top, front, and sleeping-bag access are common | Moderate to good; not waterproof without protection | Strong frames and replaceable straps improve service life |
| Expedition or load-hauling pack, 65–80 L | 2.3–3.5 kg | 18–25 kg | Large capacity; organization depends on packing cubes | Durable fabric but still requires a liner | Best for heavy-duty repairs and prolonged use |
These are category ranges, not promises for every model. Frames, fabrics, pockets, and manufacturer sizing can change the result. A pack’s stated capacity also excludes some external pockets, so compare the main-compartment volume consistently.
How to Choose Capacity Without Overpacking
Start with the equipment you actually need, not the capacity printed on a label. A representative 72-hour kit might occupy approximately 32 liters:
- Water storage and treatment equipment: 3–5 L
- Food and compact cooking items: 5–7 L
- Shelter and sleep insulation: 8–12 L
- Clothing and rain protection: 5–7 L
- First aid, hygiene, lighting, power, and documents: 3–5 L
- Tools and repair supplies: 2–3 L
Add 20–25 percent unused space for compression, irregular objects, and resupply. Thirty-two liters multiplied by 1.2 equals 38.4 liters, which explains why a 40-liter pack is often more useful than a tightly stuffed 30-liter model. Do not count all water as permanent cargo if you can refill safely along the route; water is heavy, with one liter weighing approximately one kilogram before the container is included.
Load-Bearing Comfort Matters More Than Pocket Count
For loads above roughly 8 kilograms, most of the weight should rest on the pelvis through a correctly sized hip belt. The shoulder straps should stabilize the pack rather than carry everything. When trying a pack, load it with towels or books to approximate your real weight and check the following:
- The hip belt sits over the hip bones, not around the stomach.
- The shoulder straps contact the body without creating pressure at the neck.
- The load lifters angle upward toward the shoulder-strap attachment points.
- The back panel does not force an excessive arch or leave a large unstable gap.
- The frame remains comfortable after walking for at least 20–30 minutes.
Torso length is more important than a person’s overall height. Select the correct size range or an adjustable harness, and remember that men’s, women’s, and unisex harnesses may use different shoulder-strap shapes and hip-belt contours. A pack that fits poorly cannot be rescued by better organization.
Compartment Layout for Emergency Access
The main compartment should hold dense, less frequently used items such as food, spare clothing, and shelter. Put the heaviest objects close to the spine and between the shoulder blades. Keep regularly needed items in exterior pockets or the top compartment:
- Water, snacks, gloves, and a headlamp: side or hip-belt pockets
- Rain shell and insulation layer: top or front-access pocket
- Documents, cash, power bank, and map: protected internal sleeve
- First-aid supplies: clearly marked, reachable without unpacking
- Repair kit and cordage: small pouch so they do not disappear at the bottom
Too many narrow pockets create dead space and make it difficult to replace supplies. A large, uncomplicated main compartment paired with two or three useful access points is usually easier to maintain than a bag divided into numerous specialized sections.
Water Resistance, Repairability, and Ownership Costs
Most “water-resistant” backpacks are not waterproof. Coated nylon or polyester can shed rain, but zippers, stitching, and seams remain vulnerable. Use a pack liner or waterproof dry bags for sleeping insulation, electronics, documents, and spare clothing. A rain cover helps in sustained rain but can blow off or collect water on the underside.
Repairability is an overlooked survival feature. Favor standard buckles, accessible stitching, reinforced haul handles, replaceable shock cord, and fabric heavy enough to accept patches. Keep spare buckles, nylon webbing, needle and heavy thread, adhesive repair tape, and seam sealer. The parts most likely to wear first are zipper pulls, elastic cord, mesh pockets, hip-belt padding, and shoulder-strap edges.
After use, empty every pocket, shake out grit, and air-dry the pack fully. Spot-clean with lukewarm water and mild soap; avoid bleach, solvents, heated drying, and unnecessary machine washing because they can damage coatings and foam. Inspect the frame, stitching, and buckles twice a year, especially if the pack stays in a vehicle where heat accelerates coating deterioration.
Final Buying Decision
Choose a 24–30-liter daypack if your priority is daily readiness and rapid urban movement. Choose a 35–45-liter framed hiking pack for the best overall evacuation balance. Choose 50–65 liters for genuine outdoor shelter and multi-day equipment, and 65–75 liters only for bulky or cold-weather loads that you have already measured and practiced carrying.
The best survival backpack is therefore the smallest pack that safely holds your actual kit, fits your torso, transfers weight to your hips, and can be repaired after a hard trip. Capacity and pocket count are useful specifications, but fit, sensible packing, weather protection, and routine maintenance determine whether the bag remains useful when carrying it matters most.





Write Your Review
No reviews yet. Be the first to share your experience!