

Key takeaways
- Fixed leg loops: lighter, less bulky, and often more comfortable for sport climbing or indoor sessions. They work best when your clothing and body size do not change much.
- Adjustable leg loops: better for trad climbing, winter climbing, and routes requiring extra layers. They also make it easier to share a harness among users, although a personal fit is preferable.
- Elasticated designs: allow the leg loops to move with you but are not a substitute for correct adjustment. Check that the elastic has not stretched or frayed.
The best climbing harnesses are the ones that fit securely without pressure points, provide enough gear storage for your climbing style, and carry the correct certification for the routes you climb—rather than simply the lightest or most padded model.
Our top picks
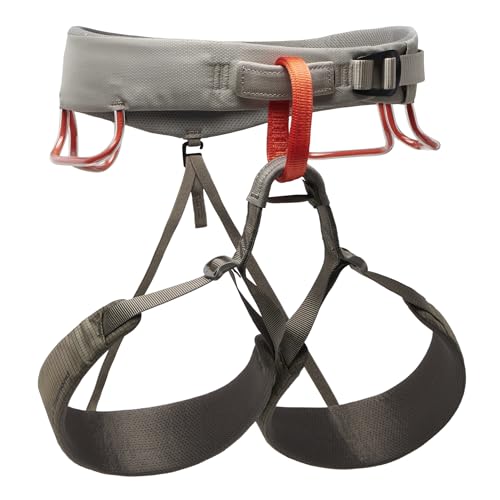


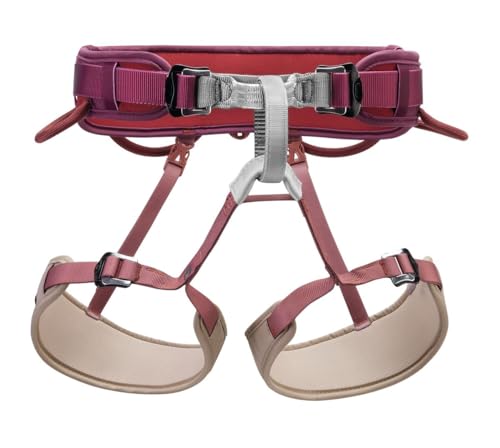
As an Amazon Associate we earn from qualifying purchases at no extra cost to you. Ratings are shown as listed on Amazon.
Quick picks by climbing situation
| Climbing situation | Best harness design | Useful target specifications | Examples to consider | Typical price range |
|---|---|---|---|---|
| Indoor gym climbing | Light, simple harness with comfortable waist belt | 300–450 g; 2–4 gear loops; adjustable leg loops optional | Black Diamond Solution, Petzl Sama, Edelrid Jay | $60–$100 |
| Sport climbing outdoors | Light harness with four gear loops and quick-adjust waist belt | 300–450 g; 4 loops; breathable padding; two tie-in points | Petzl Sama, Black Diamond Solution, Mammut Ophir | $70–$120 |
| Trad climbing | Adjustable harness with substantial gear capacity | 400–600 g; 4–6 loops; rear haul loop; adjustable leg loops | Black Diamond Technician, Petzl Adjama, Edelrid Sirana | $90–$150 |
| Long multi-pitch routes | Low-bulk harness balancing padding and weight | 350–500 g; 4–5 loops; haul loop; ventilated construction | Petzl Adjama, Black Diamond Solution Guide, Mammut Ophir 4 Slide | $90–$160 |
Weights and prices vary by size, gender-specific cut, and year of manufacture. Treat the figures as buying targets rather than exact product specifications.
What separates a good climbing harness from an average one?
Fit comes before padding
A harness should sit above the hip bones and remain in place when you lean back, hang, or invert slightly. The waist belt must tighten securely without its buckle reaching the end of its adjustment range. With the buckle correctly doubled back, you should normally have several centimeters of strap remaining.
For a basic fit check, put the harness on over the clothing you expect to wear while climbing. Tighten the waist belt, then lift one foot at a time and perform a shallow squat. The leg loops should allow movement without cutting into the groin. You should be able to slide two fingers under the waist belt, but you should not be able to pull it down over your hip bones.
Do not choose a harness solely by waist measurement. Two models with the same stated size can feel very different because of belt width, rise, leg-loop shape, and the distance between the waist and leg loops. Try the harness while wearing a chalk bag and the type of trousers or layers you use outside.
Fixed or adjustable leg loops?
- Fixed leg loops: lighter, less bulky, and often more comfortable for sport climbing or indoor sessions. They work best when your clothing and body size do not change much.
- Adjustable leg loops: better for trad climbing, winter climbing, and routes requiring extra layers. They also make it easier to share a harness among users, although a personal fit is preferable.
- Elasticated designs: allow the leg loops to move with you but are not a substitute for correct adjustment. Check that the elastic has not stretched or frayed.
Padding and pressure distribution
More padding is not automatically safer. It can improve comfort during long belays, but thick foam may retain heat, add weight, and create pressure if the harness shape does not match your body. Many modern harnesses use thin foam, mesh, or load-distributing webbing to spread pressure without becoming bulky.
For short gym climbs, a lightly padded harness is usually sufficient. For multi-pitch climbing, prioritize even pressure when hanging for several minutes. Sit in the harness at a gear shop for at least five minutes and check for pinching, numbness, or pressure at the inner thighs.
Gear loops: how many do you actually need?
Gear loops are for organizing equipment, not for connecting a climbing rope or personal safety system. A standard sport rack may need only two front loops: one for quickdraws and one for a few slings or spare carabiners. Four loops are more versatile because they separate equipment by side and leave room for a belay device, anchor gear, and spare layers.
Trad climbers should look for four substantial loops at minimum, and often five or six. A practical arrangement is:
- Front left: small cams, quickdraws, or frequently used protection.
- Front right: quickdraws and smaller hardware.
- Rear left and right: larger cams, nuts, slings, and spare carabiners.
- Additional rear or side loops: water bottle, approach gear, or an extensive rack.
Rigid loops are easy to clip while wearing gloves but can catch on clothing. Flexible textile loops reduce bulk and are comfortable under a backpack hip belt. A haul loop is useful for a tag line or second rope; it is not designed to hold a person and should not be used as a tie-in point.
Certification: what the labels mean
Look for a harness marked EN 12277 Type C, the European standard category for sit harnesses. A UIAA 105 marking indicates compliance with the International Climbing and Mountaineering Federation’s harness standard. Many products carry both markings, while harnesses sold in North America may also reference applicable ASTM requirements.
Certification does not tell you whether a harness is ideal for gym, sport, or trad climbing. It indicates that the harness has met defined requirements for construction and strength when used as directed. The marking should be permanently attached to the harness, usually on a label near the waist belt. Buy from an established climbing retailer and check the manufacturer’s instructions, especially if purchasing an older or second-hand harness.
A full-body or chest harness is a different product category. A standard sit harness is appropriate for most recreational climbing, but children and people with particular body proportions may need specialist advice about harness configuration and fit.
A decision matrix for choosing the right harness
| Your priority | Choose | Avoid prioritizing |
|---|---|---|
| Lowest cost for occasional gym use | Simple EN 12277 Type C harness, fixed loops, two or four gear loops | Ultralight construction with delicate materials if you are still learning to fit and handle gear |
| First outdoor sport harness | Four gear loops, breathable padding, easy waist adjustment | Too few loops or a belt that shifts when weighted |
| Frequent trad climbing | Adjustable leg loops, four to six gear loops, durable fabric, haul loop | Minimalist indoor models with limited storage |
| Winter or shoulder-season climbing | Adjustable leg loops and enough waist adjustment for clothing | Fixed loops that become restrictive over insulated trousers |
| Long hanging belays | Wide, well-shaped waist belt and balanced padding | Choosing solely by grams |
| Travel and frequent packing | Low-bulk harness with flexible gear loops and a compact waist belt | Oversized padding that takes up unnecessary luggage space |
How to fit and inspect a harness
- Identify the waist belt. It should sit above the hip bones, not around the soft part of the abdomen.
- Center the buckle. Follow the manufacturer’s threading instructions. If the harness uses a double-back buckle, confirm the webbing has been routed correctly.
- Adjust the leg loops. Remove slack without compressing your legs. Move through a deep squat and raise each knee to test mobility.
- Check the tie-in points. The rope is normally tied through both reinforced tie-in points, following the manufacturer’s instructions. Never tie into gear loops or the haul loop.
- Inspect before every session. Look for cuts, fuzzy or unusually thin webbing, damaged stitching, distorted buckles, worn tie-in points, and broken elastic.
Clean a harness according to its instructions, usually with lukewarm water and mild soap. Avoid bleach, solvents, washing-machine agitation unless specifically approved, and direct high heat. Dry it completely away from sunlight and heaters before storage. Keep it cool, dry, and away from chemicals, sharp tools, and car trunks that become extremely hot.
Ownership costs and replacement timing
A harness may cost roughly $60–$160, but the useful value depends on frequency. For example, a $100 harness used twice weekly for two years costs about $0.96 per session: $100 divided by approximately 104 sessions. A $70 harness used six times before being abandoned because it has poor fit costs about $11.67 per use. Trying on several models is often more economical than buying the cheapest option.
The waist belt and tie-in points usually show wear before the rest of the harness. Repeated rubbing from ropes, rough rock, crampon points, and metal hardware can damage fibers. Chalk and dirt are less immediately destructive but can hide abrasion. Retire the harness after a significant fall onto it, chemical contamination, visible damage, or whenever the manufacturer’s stated service life has elapsed. If you are uncertain, stop using it and ask the manufacturer or a qualified climbing professional for an inspection.
Bottom line
For most new climbers, the best climbing harnesses are a certified, well-fitting model with four gear loops, moderate padding, and straightforward waist adjustment. Pick a lighter fixed-leg design for gym and sport climbing if it fits well; choose adjustable legs and greater gear capacity for trad, winter, or layered climbing. A comfortable harness encourages correct use, but certification, fit, inspection, and replacement discipline are what make it suitable for climbing safety.






Write Your Review
No reviews yet. Be the first to share your experience!