

Key takeaways
- A compact mirrorless body with a standard zoom generally needs roughly 24 × 14 × 12 cm of protected space, though professional bodies and battery grips need more height.
- A DSLR or full-size mirrorless body with a 70–200 mm lens attached often needs approximately 34–38 cm of length and 17–20 cm of height.
- A folding camera drone, controller, three batteries, charger, and spare propellers commonly require 8–12 liters once protected against impact.
- A telephoto lens carried separately is easier to protect in a tall insert than in a shallow everyday backpack with horizontal dividers.
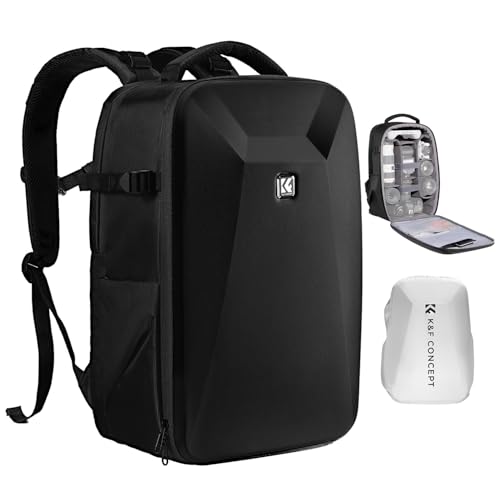
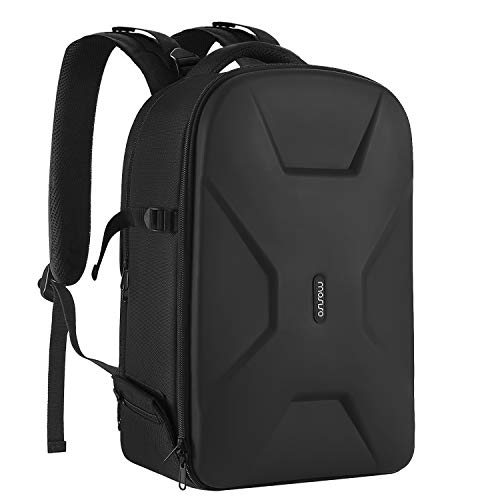
The best camera backpacks for travel and hiking are the Lowepro PhotoSport X 45L for large DSLR or drone kits, the Shimoda Action X50 for maximum protection and access, the Tenba Axis V2 24L for a compact mirrorless setup, and the Peak Design Everyday Backpack 20L for urban travel with occasional camera use.
Our top picks


As an Amazon Associate we earn from qualifying purchases at no extra cost to you. Ratings are shown as listed on Amazon.
Best camera backpacks by situation
| Backpack | Best for | Camera storage | Approx. weight | Weather protection | Typical market range |
|---|---|---|---|---|---|
| Lowepro PhotoSport X 45L | Multi-day hiking and DSLR or drone kits | Removable 12L camera insert; main pack expands to 45L | About 2.1 kg | Included all-weather cover; water-resistant outer fabrics | US$300–$400 |
| Shimoda Action X50 | Large mirrorless, DSLR, video, or drone loads | Removable Core Unit, commonly available in medium or large sizes | About 2.0–2.3 kg, depending on insert | Rain cover and water-resistant construction | US$300–$450 |
| Tenba Axis V2 24L | Day hikes with a medium mirrorless kit | Full-length padded camera insert; approximately 10–14L depending on configuration | About 1.6–1.8 kg | Water-resistant fabric and included cover on many configurations | US$200–$300 |
| Peak Design Everyday Backpack 20L | City travel and light day trips | Configurable padded divider system; suitable for one body and 2–4 lenses | About 1.5 kg | Weather-resistant shell and sealed zippers; no substitute for a dedicated rain cover | US$250–$300 |
| WANDRD PRVKE 31L | Travel carry-on organization and hybrid camera gear | Optional camera cube, commonly about 8–13L | About 1.3–1.5 kg before a cube | Water-resistant tarpaulin-style materials and roll-top closure | US$200–$300 before optional accessories |
What separates a good camera backpack from a padded daypack?
A camera backpack has to protect equipment while the bag is moving, not merely keep lenses from touching one another. Look for a padded base, dividers that resist collapsing, and an insert that can be removed when the bag is used for ordinary clothing or food. A thin foam sleeve may protect against scratches but will not provide the same impact protection as a structured camera cube with approximately 10–20 mm of padding.
Compartment dimensions matter more than the advertised capacity. A 30-liter pack can have less usable camera space than a well-shaped 20-liter model if the camera compartment is narrow or interrupted by a laptop sleeve. Before buying, measure the longest lens with its hood reversed, the camera body with an attached plate, and the drone with spare batteries installed or stored beside it.
Typical equipment footprints
- A compact mirrorless body with a standard zoom generally needs roughly 24 × 14 × 12 cm of protected space, though professional bodies and battery grips need more height.
- A DSLR or full-size mirrorless body with a 70–200 mm lens attached often needs approximately 34–38 cm of length and 17–20 cm of height.
- A folding camera drone, controller, three batteries, charger, and spare propellers commonly require 8–12 liters once protected against impact.
- A telephoto lens carried separately is easier to protect in a tall insert than in a shallow everyday backpack with horizontal dividers.
Head-to-head: hiking protection versus travel convenience
Lowepro PhotoSport X 45L: best for a serious hiking load
The PhotoSport X 45L is the strongest choice when camera equipment shares space with overnight clothing, shelter, food, and a hydration system. Its removable camera insert keeps the sensitive equipment together, while the larger outer compartment carries hiking supplies. That separation is valuable: wet rain gear can stay away from lenses, and the whole camera module can be removed at camp.
Its limitations are size and empty weight. A 45-liter pack is excessive for a short city walk, and a heavily padded insert reduces the space available for clothing. Choose it when the camera is part of a multi-day load rather than when photography is an occasional addition to a daypack.
Shimoda Action X50: best access and fit for large kits
The Action X50 suits photographers who change lenses frequently or carry a body, several lenses, a drone, and accessories. Shimoda’s removable Core Unit approach lets you select a smaller or larger protected module, while the rear camera access reduces the chance of dropping equipment when the pack is placed on the ground.
The side access is especially useful when the pack remains on one shoulder, but it is not a replacement for a careful packing layout. Put the most frequently used lens near the opening and place batteries in a zipped accessory pocket rather than loose beside the camera. The pack is capable of carrying more than most day hikers need, so avoid filling its capacity simply because it is available.
Tenba Axis V2 24L: best compact hiking compromise
The Axis V2 24L is a practical middle ground for a mirrorless body, two or three lenses, a jacket, water, and lunch. It offers dedicated camera protection without the bulk of a technical 40–50-liter expedition pack. Its modular interior is better suited to a photographic day hike than to a large drone or long telephoto lens.
Check the exact insert included with the version being considered. Camera backpacks can share a product family name while differing in divider layout and capacity. A tall body with a battery grip may fit in one configuration but not another.
Peak Design Everyday Backpack 20L: best for urban travel
The Everyday Backpack 20L works well when laptop carrying, public transport, and quick side access matter as much as camera protection. Its configurable dividers can create a lower camera section and leave room above for personal items. It is a good match for one mirrorless body, a standard zoom, one additional lens, and small accessories.
It is less suitable for long hikes. The camera compartment is flexible but not as voluminous as a dedicated camera cube, and the pack’s capacity can disappear quickly after adding a laptop, water bottle, and rain layer. For extended exposure to heavy rain, use an external cover or dry bags rather than relying only on water-resistant fabric.
WANDRD PRVKE 31L: best for hybrid travel packing
The PRVKE 31L is attractive to travelers who want a mostly ordinary backpack with an optional camera cube. The roll-top section can accommodate clothing, while the cube protects the camera system. This layout is efficient for flights and day tours, but the cube is an additional purchase and adds weight.
The bag is better at organizing travel items than distributing a very heavy hiking load. If you carry a tripod, full-size telephoto lens, and several liters of water, a pack with a more substantial hip belt and adjustable harness is usually more comfortable.
Access style: decide how you retrieve the camera
- Rear access: offers strong security and keeps the camera panel away from dirty ground, but requires removing the pack before opening it. It is best for travel and rough trails.
- Side access: allows a quick lens or camera change while one shoulder strap remains on. It is fast, but the opening is usually narrower than a full rear panel.
- Top access: is convenient for a camera stored above clothing or food. It works well for travel but can force you to unpack other items before reaching the camera.
- Modular insert access: lets you remove the entire protected kit at camp or convert the bag for non-camera use. The trade-off is that the insert can consume space and add 0.5–1 kg.
Weather protection is more than a rain cover
A rain cover protects the fabric but may leave the harness, back panel, and lower corners exposed. Water-resistant zippers and coated fabrics delay water entry; they do not make a backpack waterproof. For sustained rain, place cameras and lenses inside individual dry bags or lightweight roll-top liners, leaving enough room to close them without compressing controls.
Condensation is another risk. After moving from cold rain into a warm vehicle or cabin, keep the camera sealed in a bag for approximately 30–60 minutes so it can warm gradually. This reduces moisture forming on or inside the equipment. Never pack a wet rain cover directly against camera gear; dry it separately at the first opportunity.
A simple capacity calculation before buying
Suppose a kit needs a 9-liter camera insert, 7 liters of clothing and food, 2 liters of water, and 3 liters of miscellaneous equipment. The practical load is 21 liters. Adding approximately 20% spare capacity gives:
21 L × 1.2 = 25.2 L
That points toward a 24–30-liter pack, not a tightly packed 20-liter model. If the trip includes a sleeping bag, shelter, or bulky insulated layer, add those items separately rather than assuming the camera compartment’s advertised volume is available for them.
Decision matrix
| Your situation | Recommended type | Why |
|---|---|---|
| First camera backpack, one mirrorless body, limited budget | 20–25L modular daypack | Lower cost and enough room for a body, two lenses, and personal items |
| Weekly day hikes with a medium kit | 24–32L pack with hip belt and rain cover | Balances camera access, food, water, and comfort |
| Multi-day trek with DSLR, telephoto, or drone | 40–50L technical pack with removable camera insert | Separates camera protection from camping equipment |
| Frequent flights and city travel | 20–31L travel pack with rear or side access | Prioritizes laptop protection, security, and compact organization |
| Wet climate or exposed coastal trails | Water-resistant pack plus internal dry bags | Provides backup protection when covers or zippers leak |
Ownership details that affect long-term value
The first parts to wear are usually zipper pulls, mesh water-bottle pockets, elastic divider edges, and the underside of the bag. Avoid dragging the pack over rock, and do not overload stretch pockets with heavy bottles. Brush grit from zippers before opening them, because sand can damage water-resistant zipper tracks.
Clean the exterior with lukewarm water and a soft cloth. Do not machine-wash a structured camera insert unless its care instructions specifically allow it. Remove the insert before cleaning the main pack, let every layer dry completely, and store the bag open rather than compressed. Check hook-and-loop dividers periodically; clogged fibers reduce their grip and can allow a lens to shift during movement.
For most travelers, the best camera backpack is not the one with the largest camera compartment. It is the smallest model that fits the actual kit, distributes the load comfortably, and protects equipment through the weather and access conditions the trip will produce.





Write Your Review
No reviews yet. Be the first to share your experience!